BL Firmware
- Please note that the
bootloaderhas already been pre-flashed at the factory; no need to flash it again
Enter Flash Mode
- There are two methods to enter flash mode
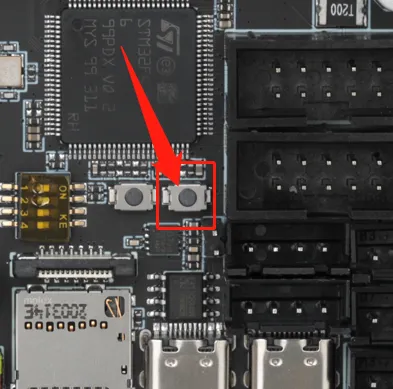
- First: With the motherboard completely powered off, hold down BOOT and then connect one end of a data cable to the motherboard and the other end to your device, suitable for Windows
- Second: After connecting one end of a data cable to the motherboard and the other end to your device, hold down BOOT and then send the command, suitable for host computers
Flash Firmware
- Windows Flash Tutorial
- Host Flash Tutorial
-
C8's bootloader firmware
- Click on the download link below
-
Loading...
-
Move DIP switches
3and4to the right, connect the slave device to the host via the built-in USB -
Move DIP switches
1and2to the left, otherwise it will affect the connection between the slave and the host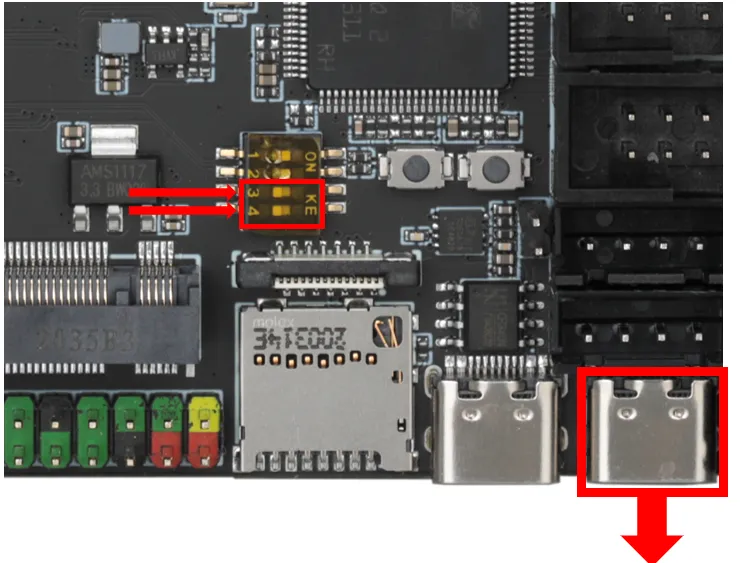
To ensure successful STM32 firmware flashing, please pay attention to the following:
- Some computers' USB ports may cause unstable flashing due to driver or signal compatibility issues. We recommend that you try connecting using a different USB port.
- If changing ports doesn't help, an effective solution is to connect via an external USB hub, which often improves compatibility.
- When the flashing software displays the error message below, try using a hub first. If the problem persists, please check or use the host computer to flash
- Flashing tool Download link
- Download
SetupSTM32CubeProgrammerandSTM32 DFU driver - Download the firmware to any directory on your computer
- Connect the motherboard to the computer using a Type-C cable, ensuring it has entered
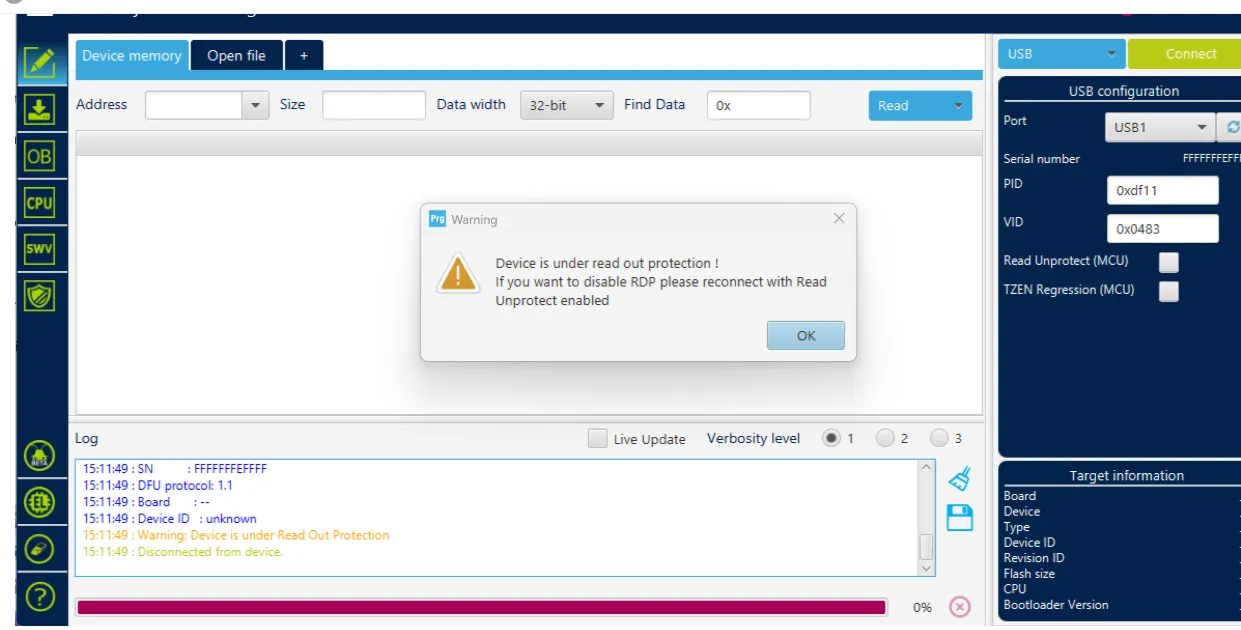
dfuflashing mode - In STM32CubeProgrammer, select USB mode, then refresh and connect
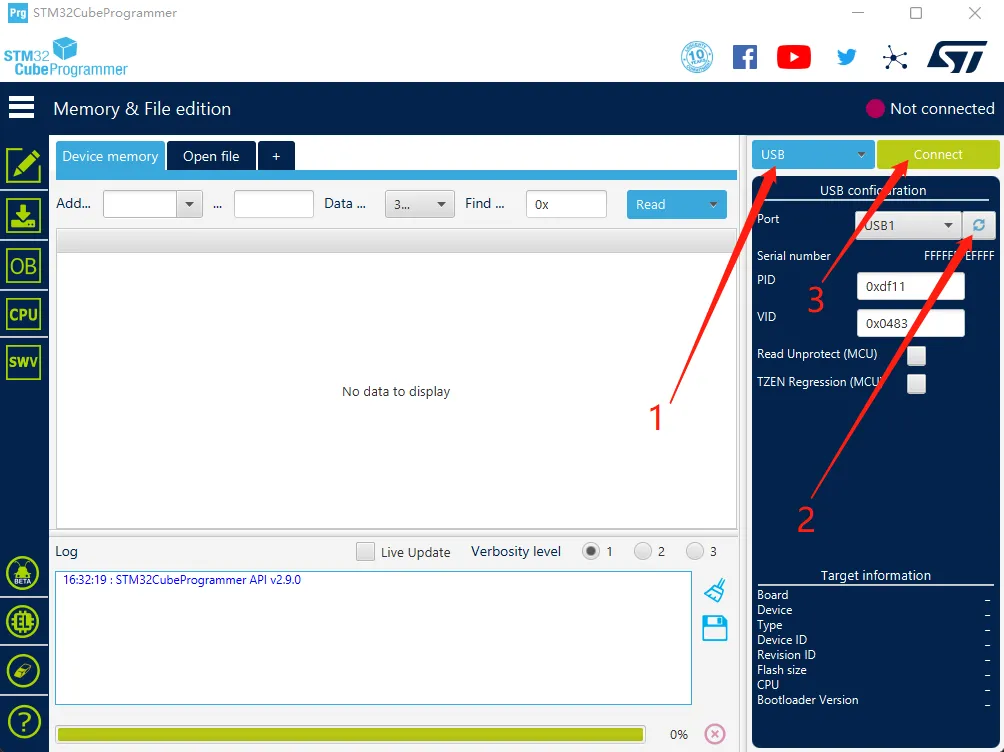
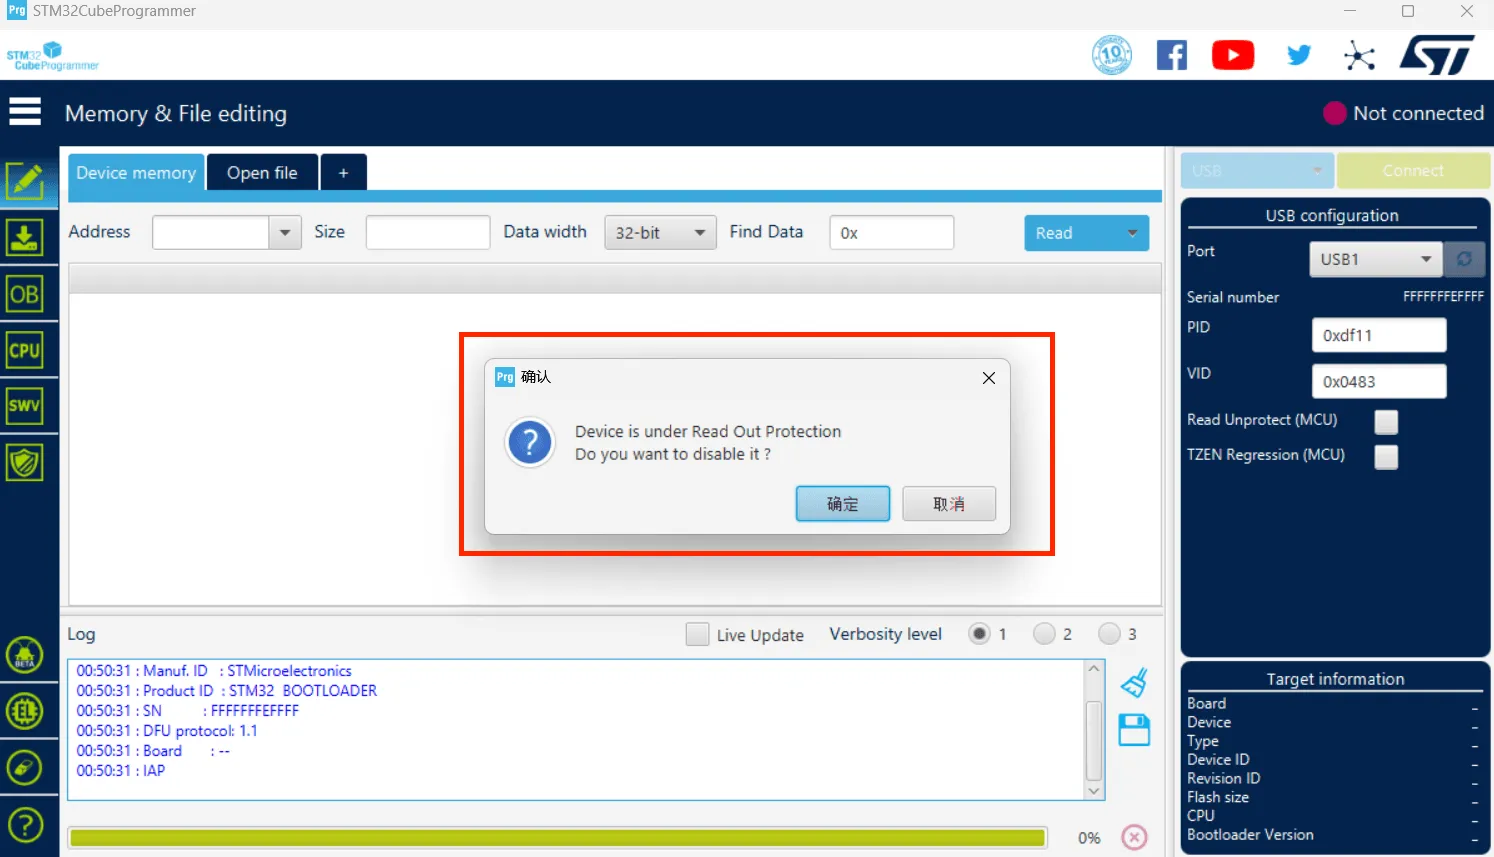
- If no error pop-up appears, the connection is successful.
Warning
If the following message appears, it indicates a computer or software issue. Please use the host computer to flash: Host Computer Flashing Guide
- Click the download icon on the left and select the options below

- Click
Browseat the arrow's location, then select the firmware you need to flash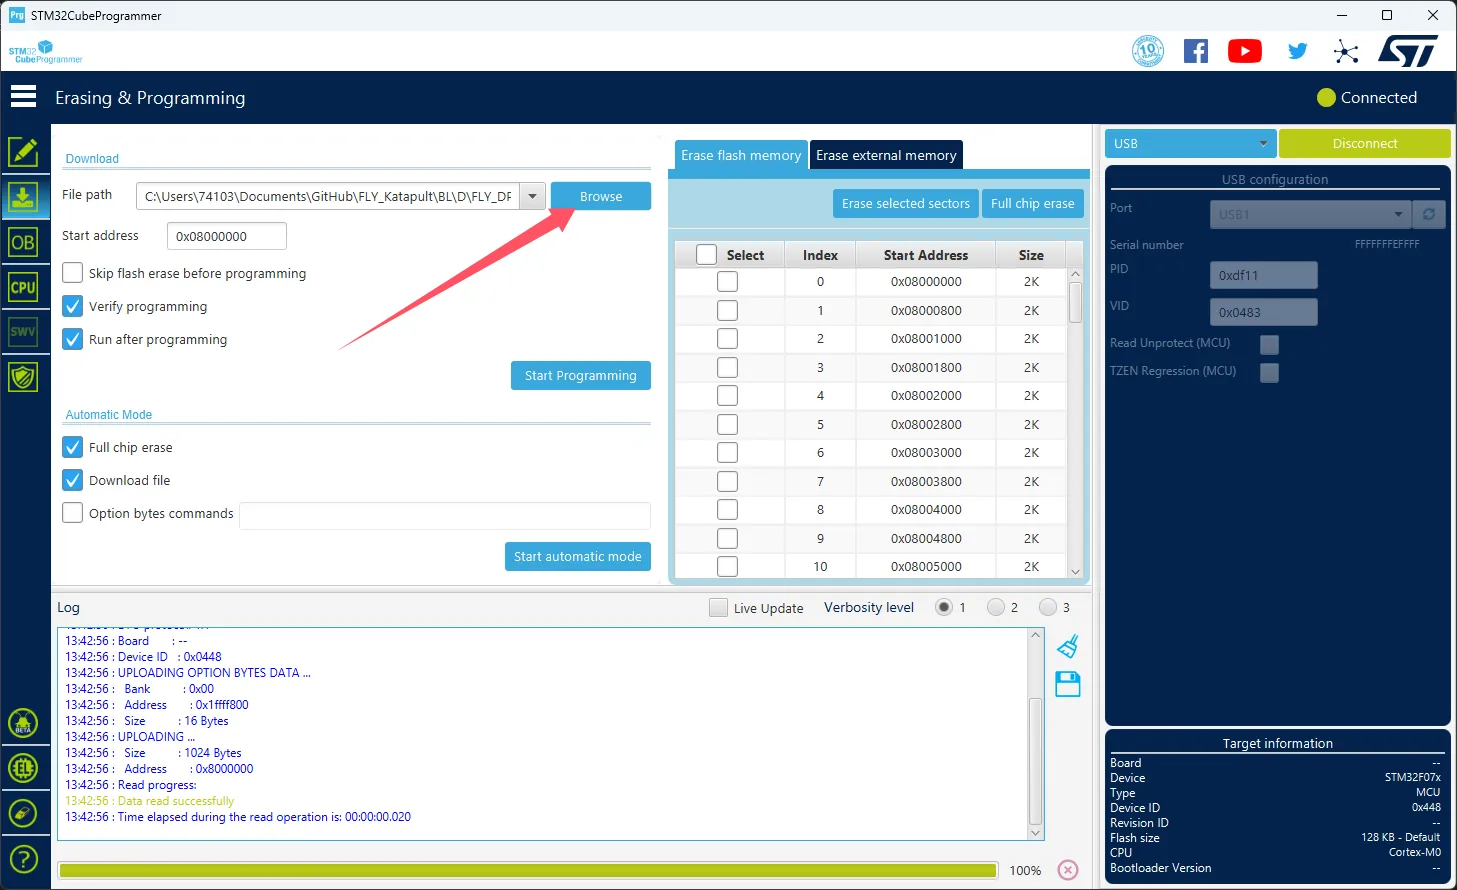
- Select
Start addressand enter0x08000000- Note: If the firmware is in
HEXformat, skip this step!!
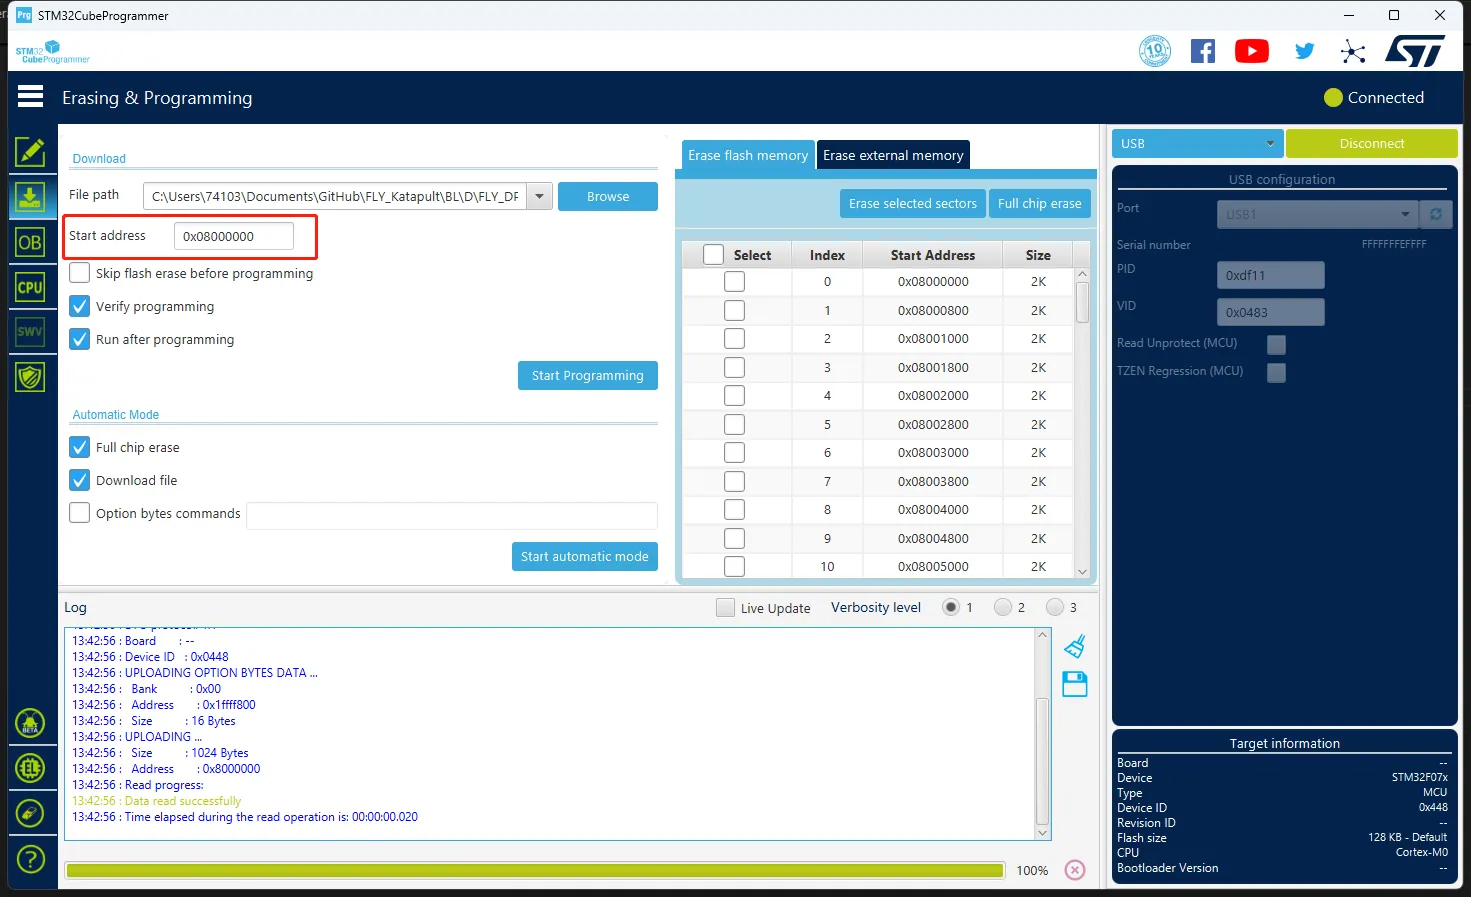
- Note: If the firmware is in
- Click
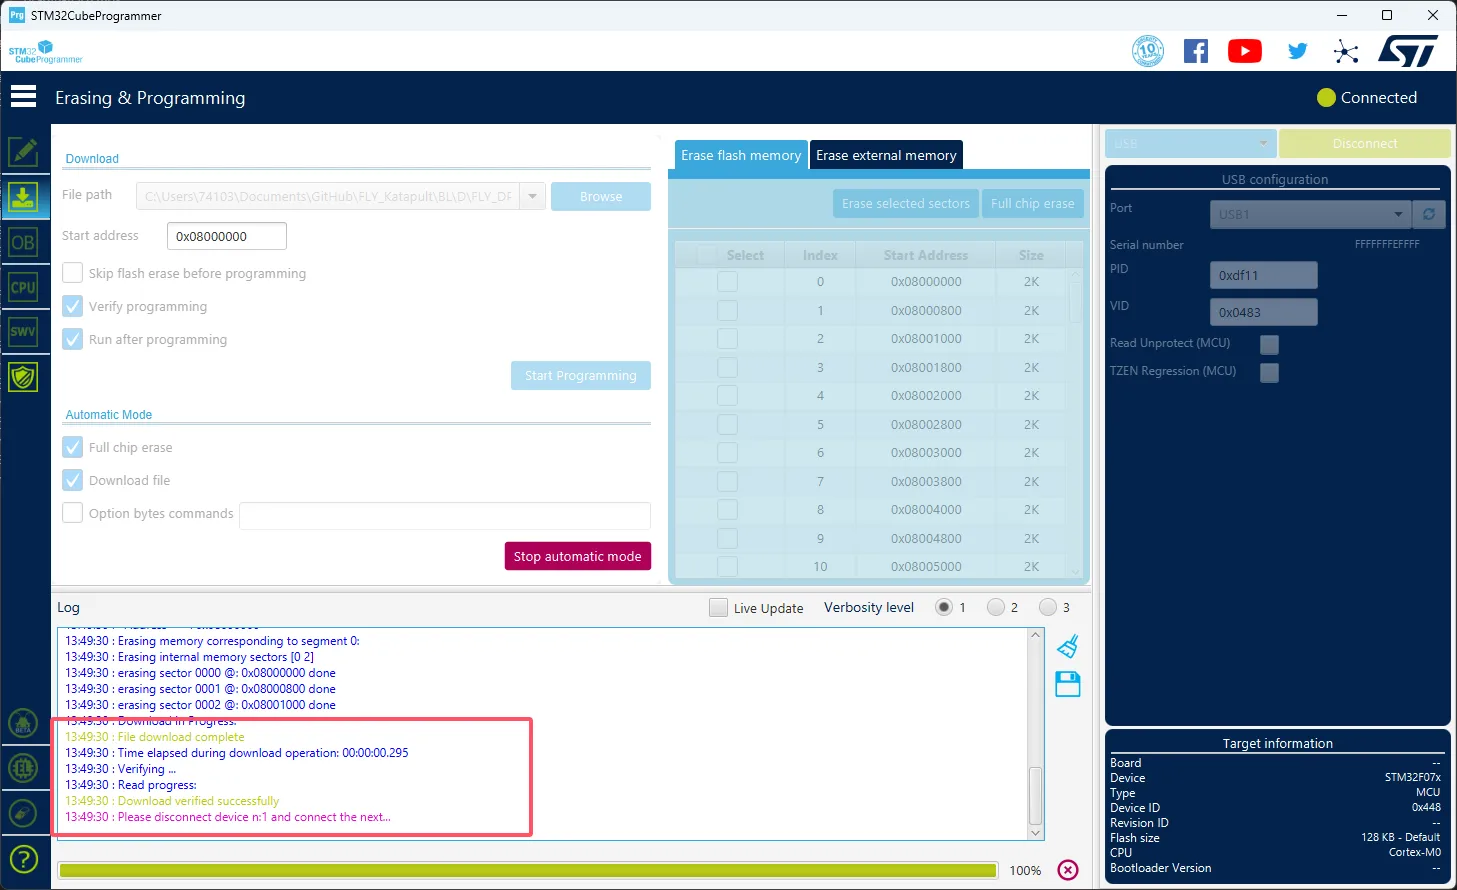
Start automatic modebelow to begin flashing the firmware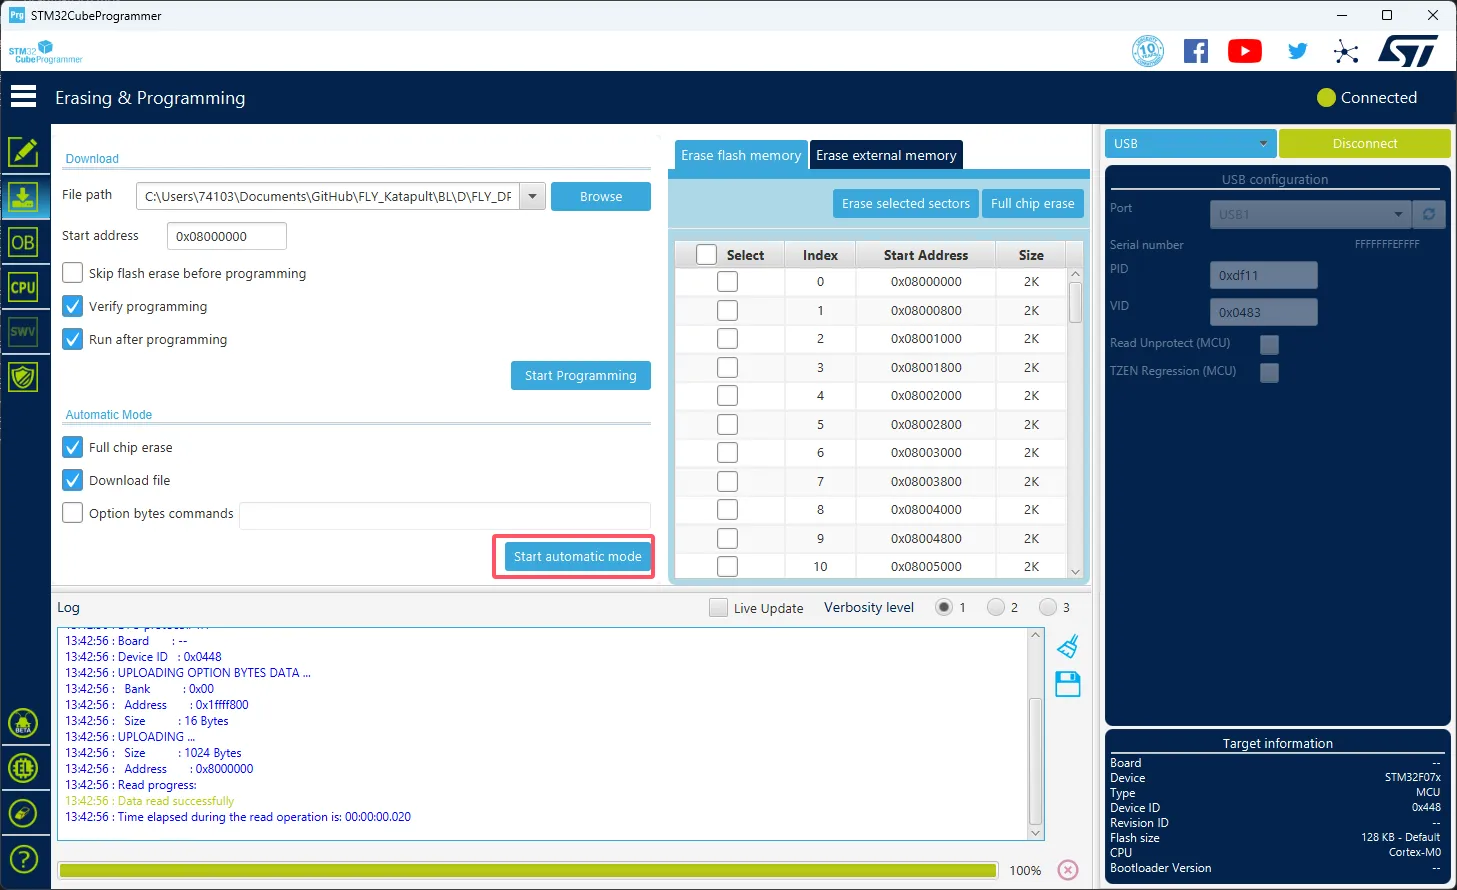
- The appearance of the message below indicates that the firmware has been successfully flashed
-
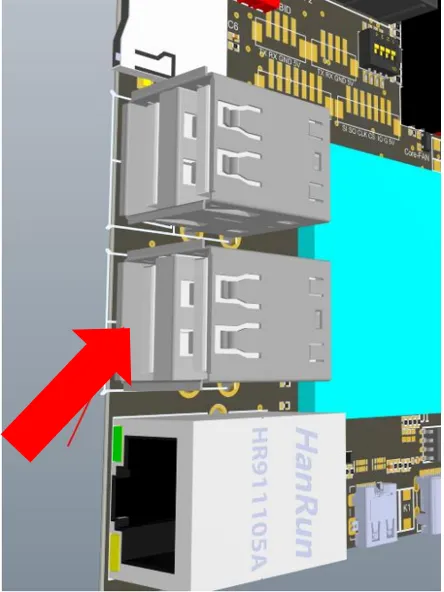
Move DIP switches
1and2to the right, connect the slave device to the host via the built-in USB -
Move DIP switches
3and4to the left, otherwise it will affect the connection between the slave and the host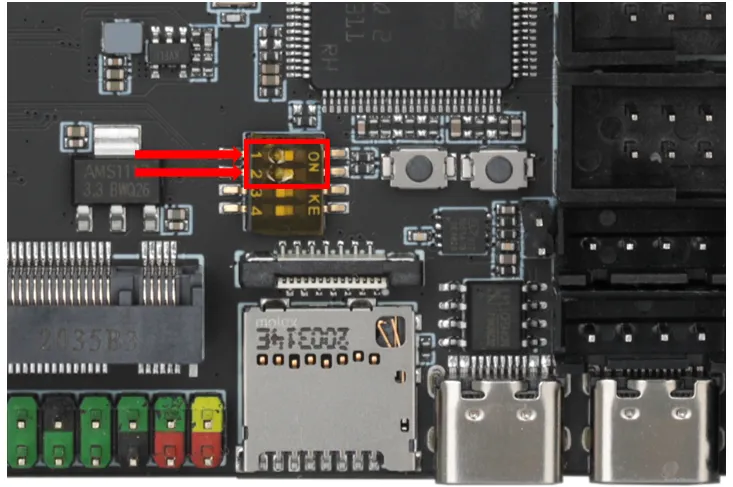
-
After adjusting the DIP switches as described above, the USB port below will be occupied by the slave device; do not connect any other devices
-
Please ensure that the host computer has internet access
-
For FlyOS-Armbian system, please use the following command first
sudo wget https://cnb.cool/3dmellow/public/static-files/-/git/raw/main/firmware/HIDBL.bin -O ~/HIDBL.bin && sudo fly-flash -d c8 -u -f ~/HIDBL.bin -
For FlyOS-FAST system, please use the following command first
sudo wget https://cnb.cool/3dmellow/public/static-files/-/git/raw/main/firmware/HIDBL.bin -O /data/HIDBL.bin && fast-flash -d c8 -u -f /data/HIDBL.bin -
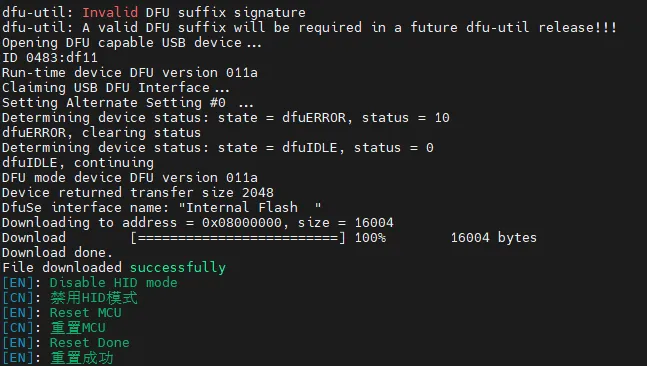
When the following prompt appears, hold down the BOOT button on the slave device and press Enter
-
When the following image appears, it means the flashing was successful and you can release the BOOT button